Yosensi Mobile App Support
Welcome to the support page for our mobile application! Below, you'll find key information to help you navigate and make the most of the app's features.
The app features three tabs at the bottom for easy access to its functionalities: Home, Devices and Profile.
Account Creation and Login
You can create an account or log in using:
- Standard Credentials: Email and password.
- Google Sign-In: Use your Google account for seamless access.
- Apple Sign-In: For iOS users, log in with your Apple ID.
Home Tab
- Switch Organization: Change the active organization to manage devices specific to it.
- Adopt New Devices: Add new devices to your organization.
- Open Device Details: Use the built-in QR code scanner to view device details instantly.
Devices Tab
- View Devices:
- See all adopted devices in your organization.
- Filter by "Nearby Devices" using Bluetooth proximity.
- Bluetooth: As you approach a device, the Bluetooth signal strengthens, enabling interaction.
- View key information: Quickly and easily access essential device details to verify and identify critical specifications or statuses.
Device Options
The options below are available in the device details once the device is connected via Bluetooth.
Configuration
Effortlessly access and modify the device configuration to adjust its behavior as needed. To change the current configuration, follow the steps below:
- Select the desired device.
- Waith until the device is connected.
- Open the ‘Configuration’ tab.
- Change the desired parameters.
- Click ‘SAVE’ to finish the process.
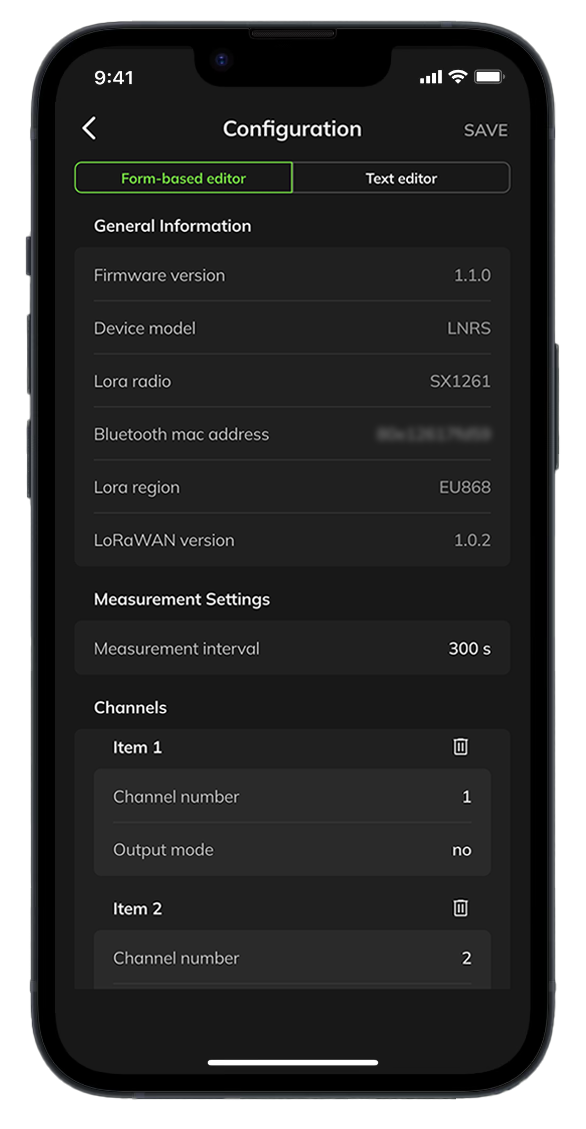
Figure 1. Device Configuration
Firmware Update
Easily update your device firmware using Bluetooth. The NEW keyword indicates that an update is available.
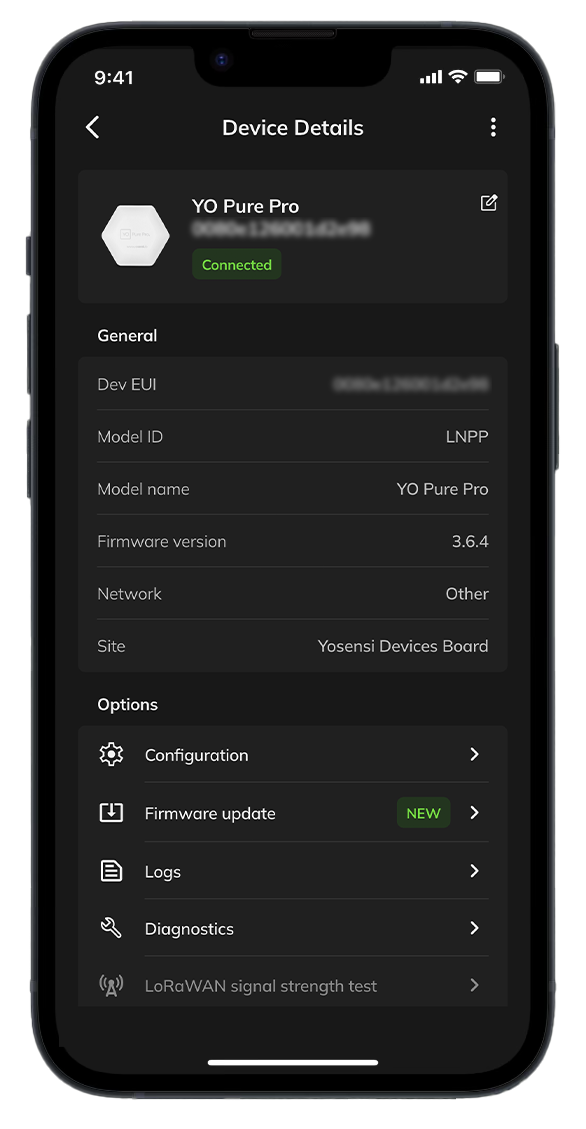
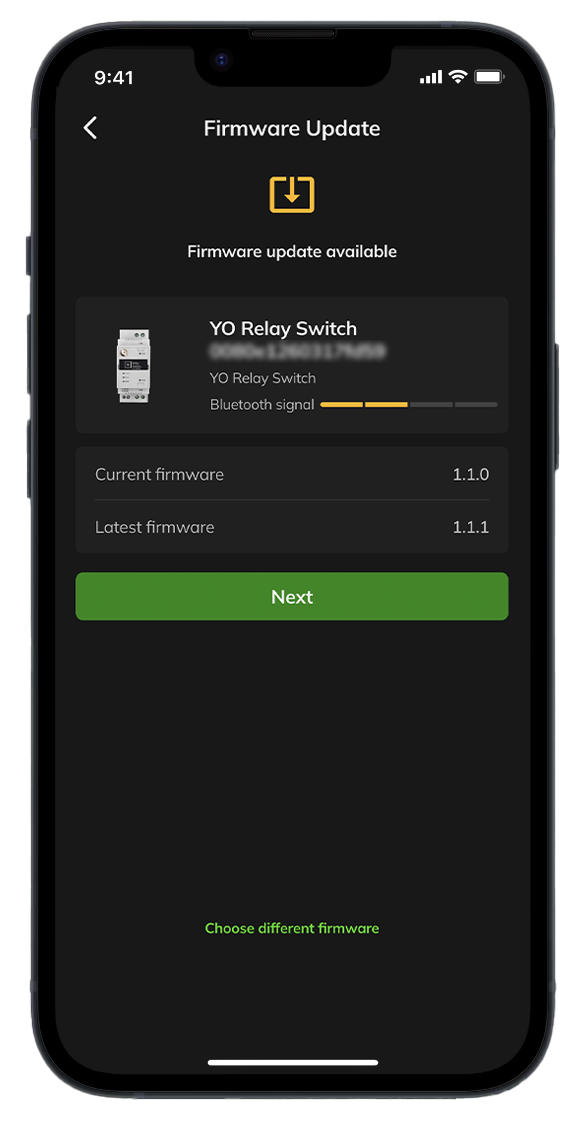
Figure 2. Firmware Update
Logs
Access detailed logs for in-depth analysis and conveniently send them directly to our support team for quick issue resolution. To send the logs, follow the steps below:
- Select the desired device.
- Wait until the device is connected via Bluetooth.
- Open the settings tab (gear icon) and select ‘Logs’.
- Click ‘UPLOAD’ to send the logs.
- Wait for the ‘Logs successfully sent’ confirmation.
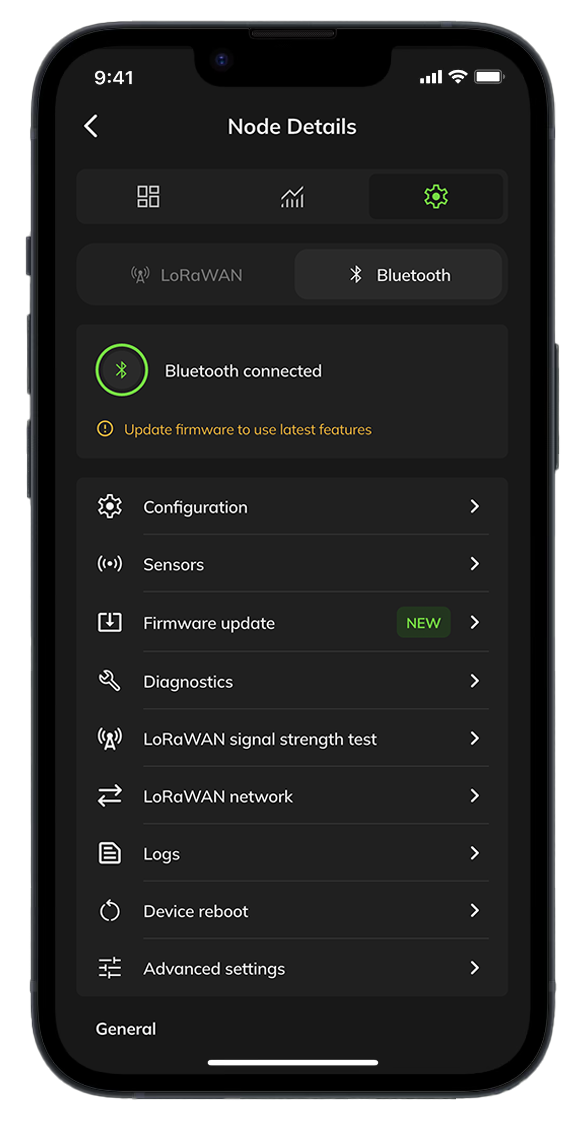
Figure 3. Node Details
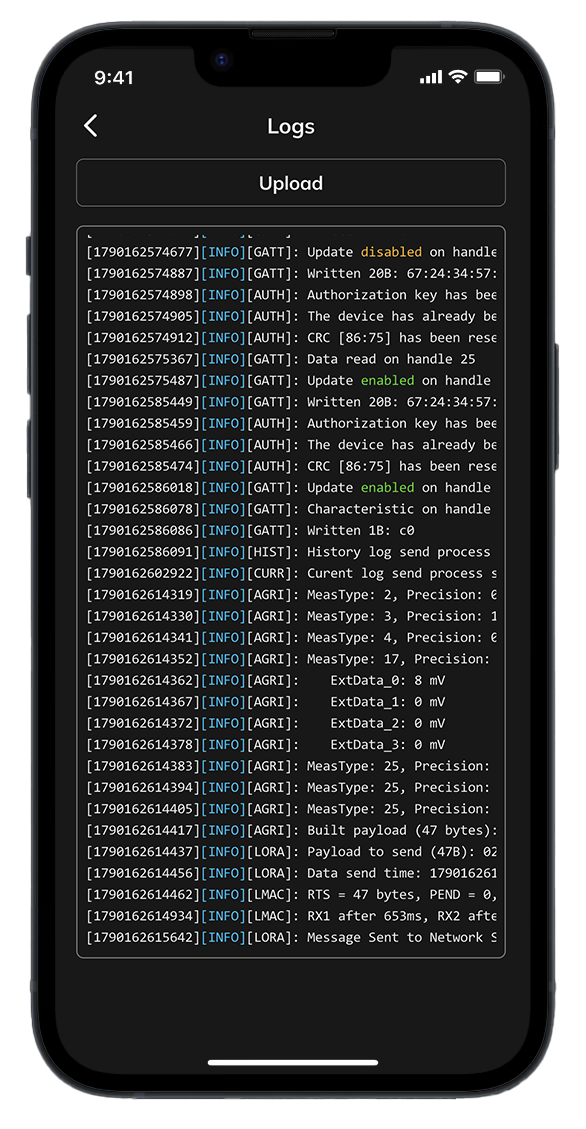
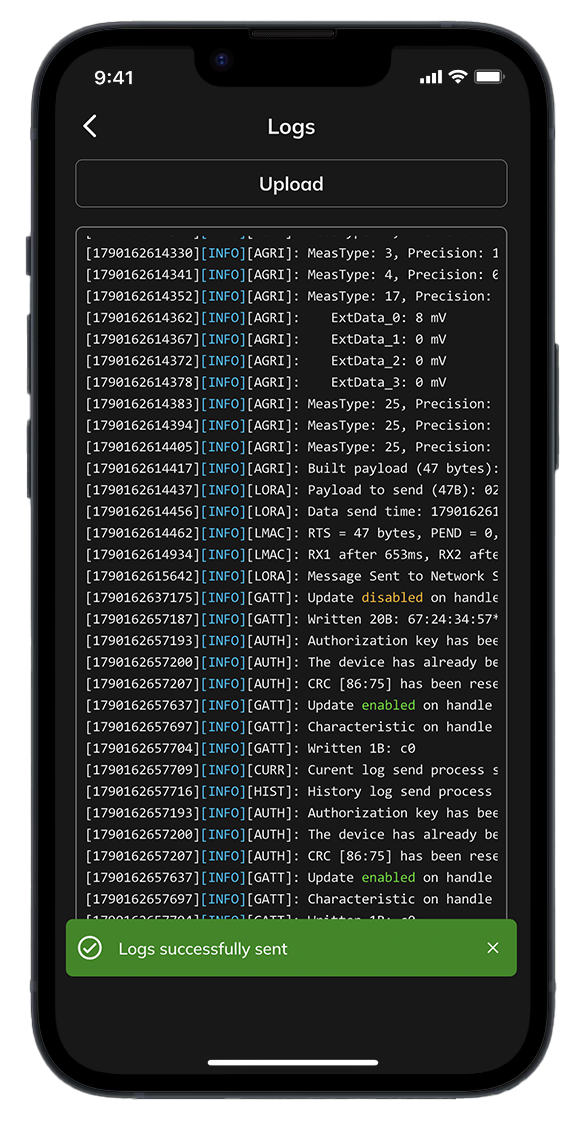
Figure 4. Sending Logs
Diagnostics
Manually initiate measurements to view real-time data and access comprehensive logs with detailed information at your fingertips.
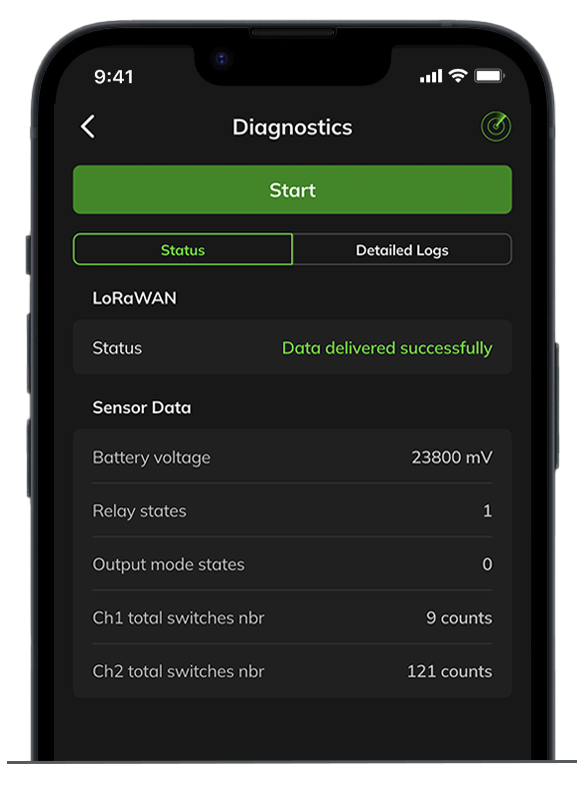
Figure 5. Diagnostics
LoRaWAN Signal Strength Test
Conduct a LoRaWAN signal strength test.
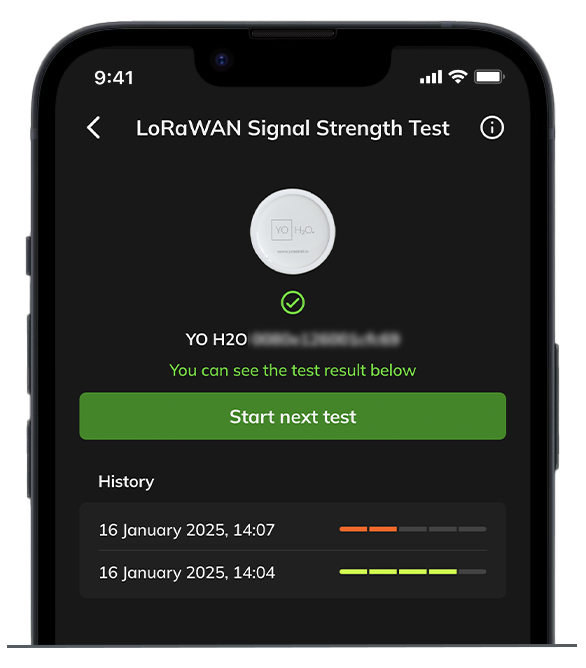
Figure 6. Signal Strength Test
LoRaWAN Network
View and modify the current network configuration to suit your requirements.
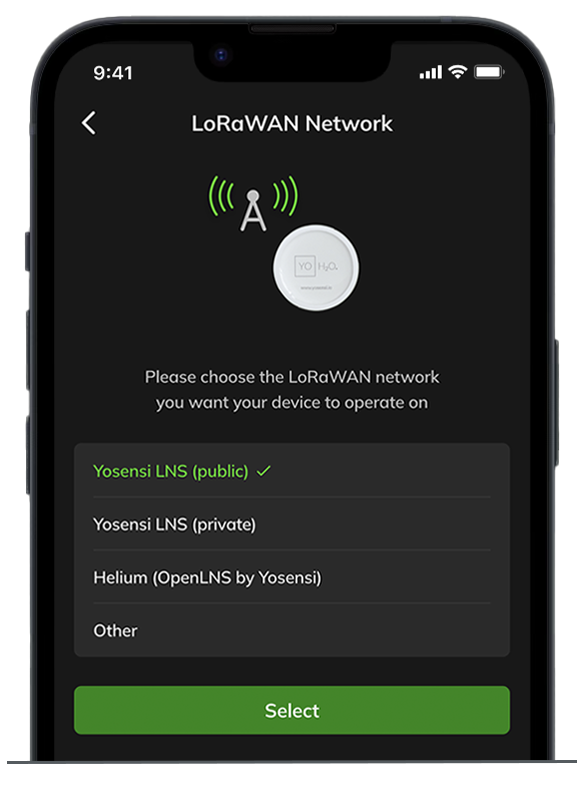
Figure 7. Change Network
Device Reboot
Initiate a manual restart to refresh the device's operation.
Profile Tab
- User Information: View and manage your profile details.
- Log Out: Sign out of your account securely.
- Contact Support: Reach out for assistance directly from the app.
- Settings Menu (via the three dots in the upper-right corner):
- Disable Automatic Device Detection: Customize device interaction settings.
- Change Default LoRaWAN Network: Select a new default network for your devices.
- Request Account Deletion: Submit a request to delete your account.
- Recover Device from Boot Mode: Access recovery options for devices stuck in boot mode.
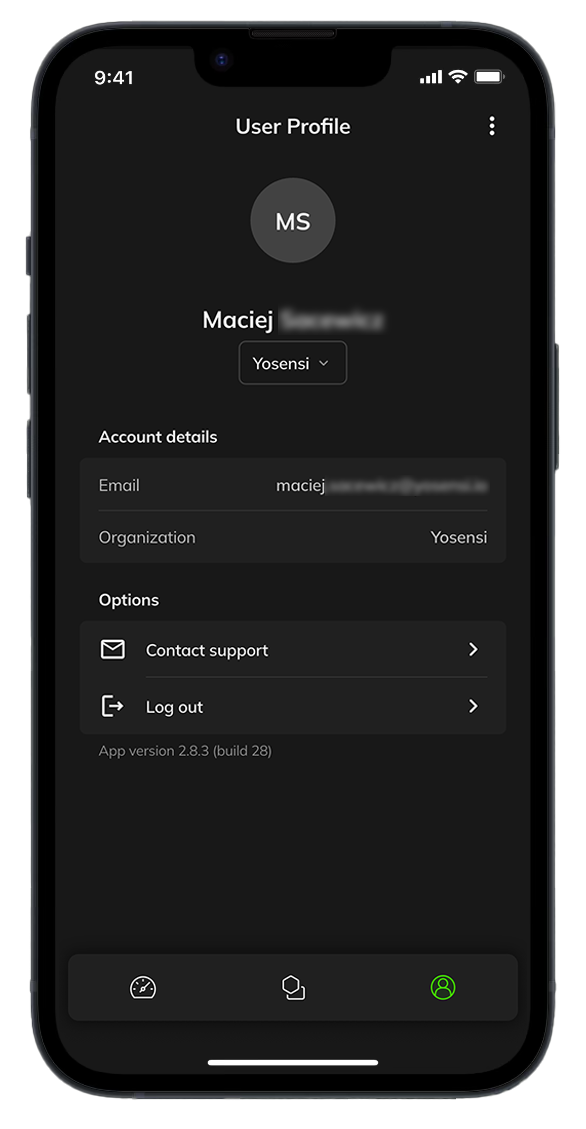
Figure 8. Profile Page
Support
Before reaching out to our support team, we kindly recommend checking our FAQ section first. It contains answers to common questions and solutions to frequent issues, which may help resolve your concern more quickly.